Table of Contents
Windows Subsystem for Linux (WSL) lets you run a Linux dev environment directly on your Windows 10 machine without the need for a virtual machine. With WSL installed, you’re able to use Linux command line tools like ssh and vim, open source languages like php and python, as well as popular system services like mysql and nginx.
In this post you’ll see how to install and enable WSL, install the Ubuntu 18.04 Linux distribution and run some commands to test out your WSL installation.
Video tutorial
If you prefer watching to reading, here’s a full video tutorial from the TopTechSkills YouTube channel covering a many of the points and examples from this article. Feel free to comment on this article or the video if you have any questions.
How to install and enable Windows Subsystem for Linux (WSL)
To install and enable Windows Subsystem for Linux (WSL) in Windows 10, all you need to do is enable the optional WSL feature via PowerShell.
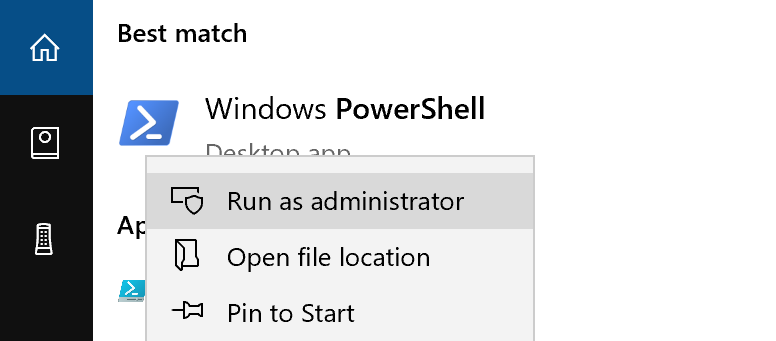
Run PowerShell as Administrator by searching for PowerShell in the start menu, right-clicking and selecting Run as administrator:
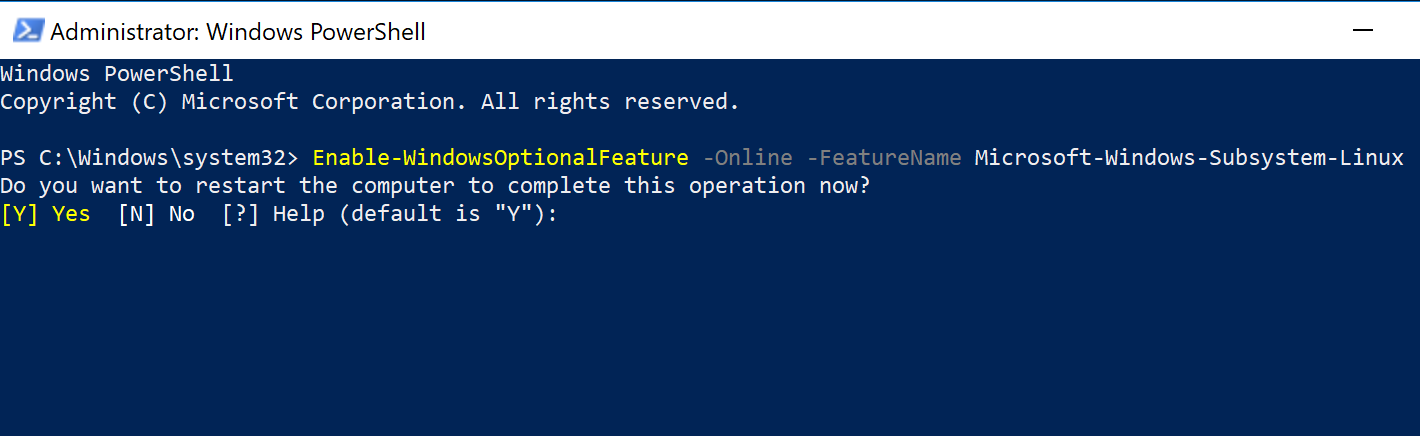
In PowerShell, run the following command to enable WSL:
Enable-WindowsOptionalFeature -Online -FeatureName Microsoft-Windows-Subsystem-Linux
Once the command completes, you will be prompted to restart Windows to complete the installation:
How to install Ubuntu 18.04 for use with WSL
In order to use the features of WSL, you first need to install a Linux distribution. There are multiple ways to download and install a Linux distribution for use with WSL, but the easiest for installing Ubuntu is simply to use the Microsoft Store.
Download and install Ubuntu 18.04 from the Windows Store
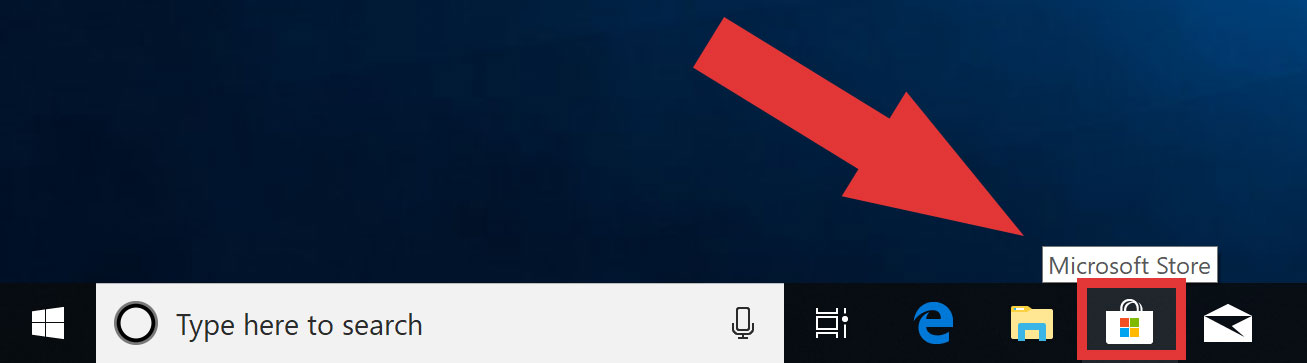
First, launch the Microsoft Store from the taskbar:
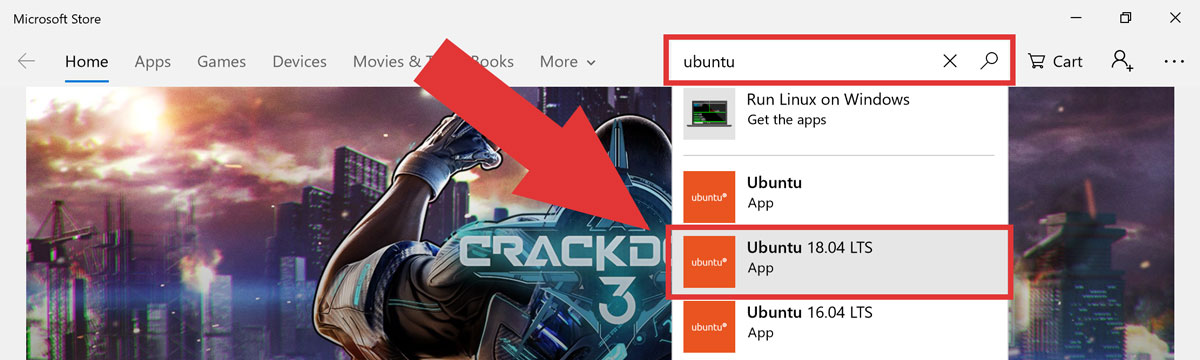
Next, search for “ubuntu” in the search box and click Ubuntu 18.04 LTS in the search results:
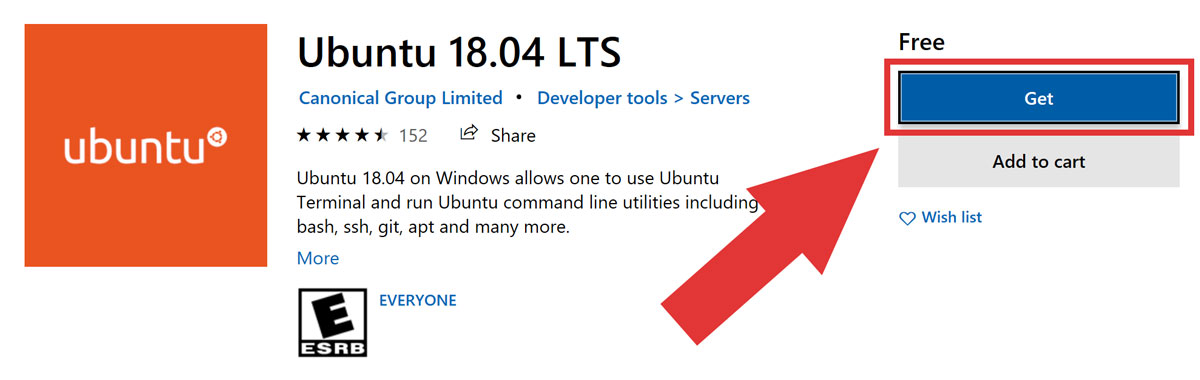
Click Get to download and install Ubuntu 18.04 LTS:
Initialize the Ubuntu 18.04 instance
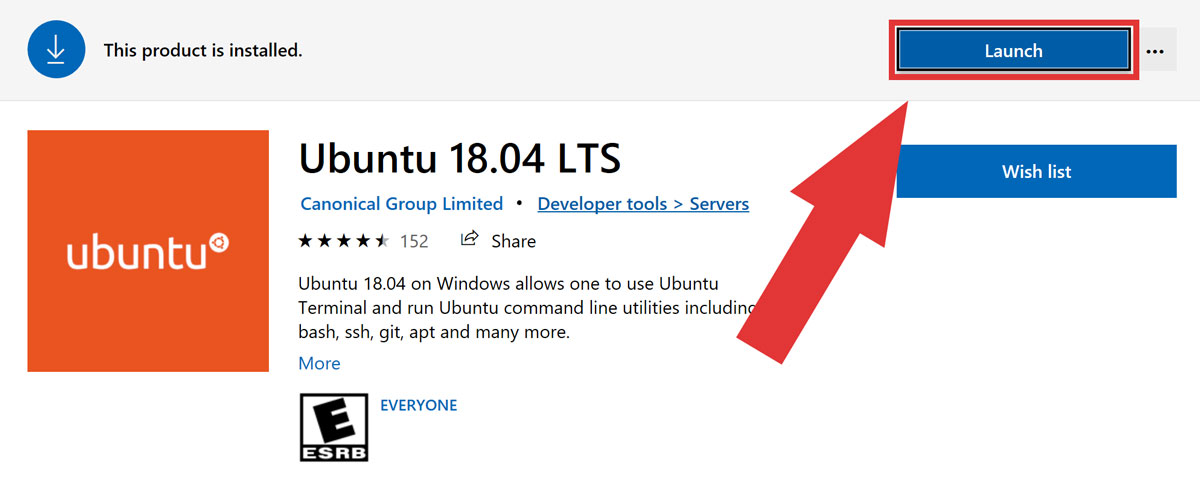
Once it has finished installing, click Launch to finalize the installation of Ubuntu 18.04:
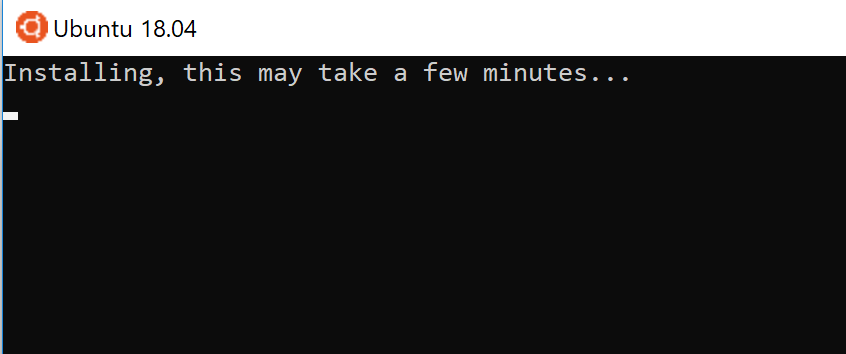
Installation will take a few minutes:
When the installation is complete, you will need to set up your username and password:
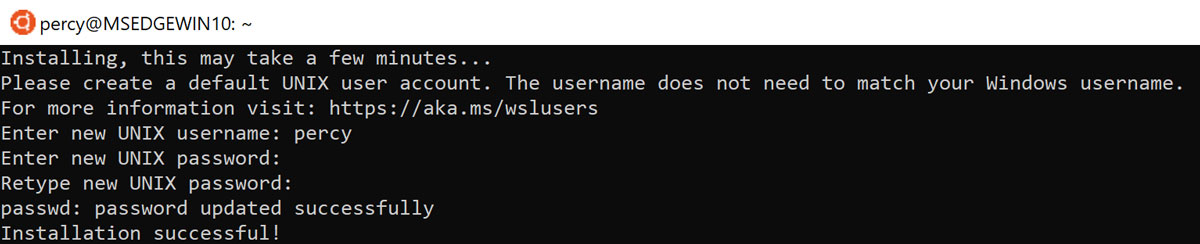
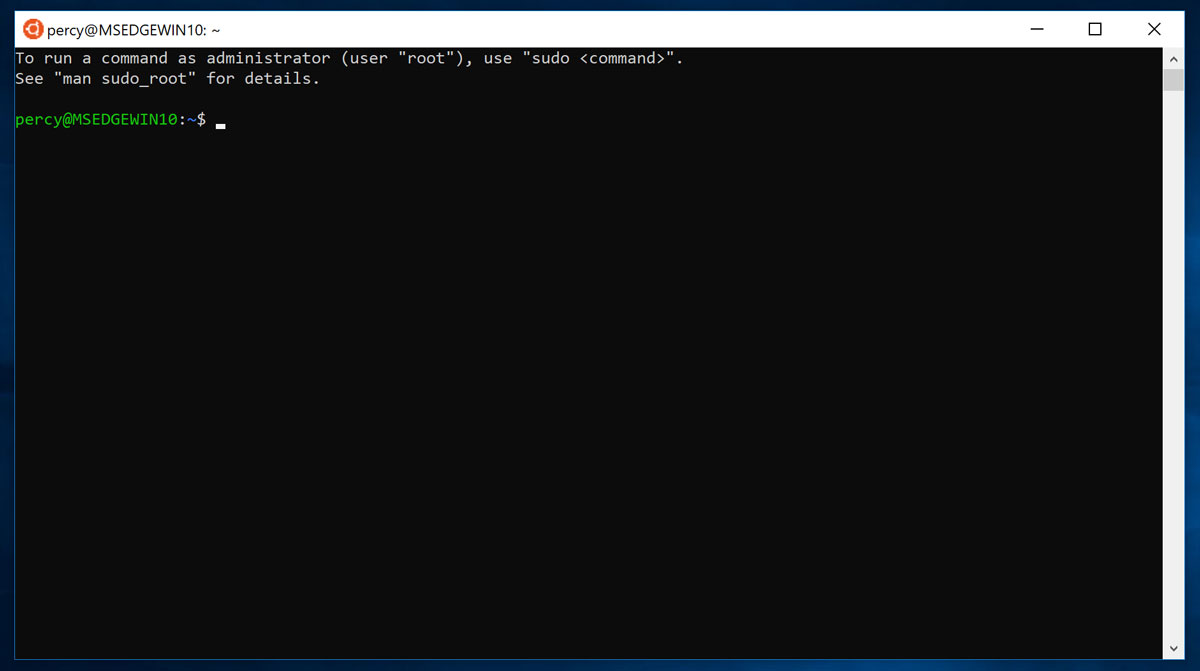
With the username and password set, the installation is complete and you can start using the bash shell right away:
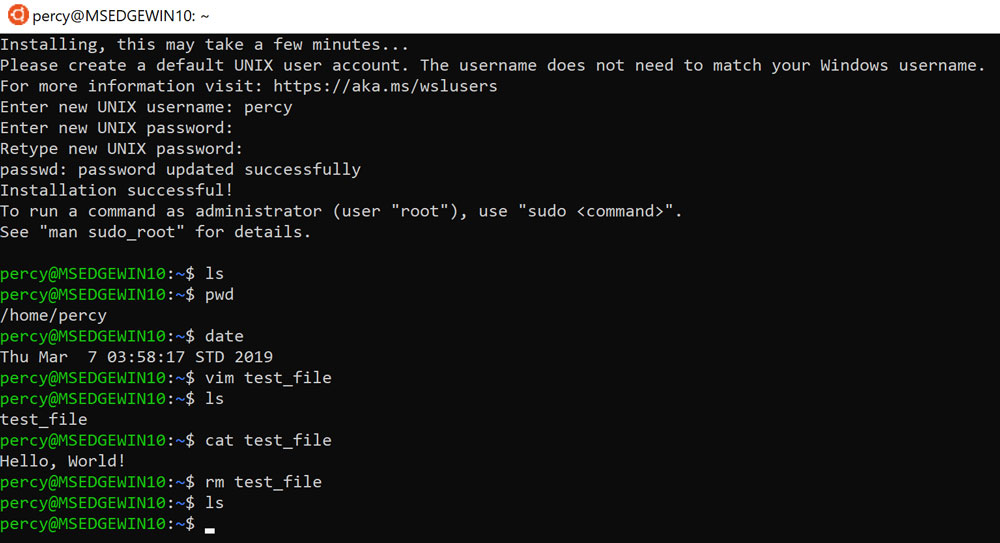
In the image above, I tested out some common Linux commands to confirm everything worked:
percy@MSEDGEWIN10:~$ ls
percy@MSEDGEWIN10:~$ pwd
/home/percy
percy@MSEDGEWIN10:~$ date
Thu Mar  7 03:58:17 STD 2019
percy@MSEDGEWIN10:~$ vim test_file
percy@MSEDGEWIN10:~$ ls
percy@MSEDGEWIN10:~$ cat test_file
Hello, World!
percy@MSEDGEWIN10:~$ rm test_file
percy@MSEDGEWIN10:~$ ls
How to launch Ubuntu via WSL at a later time
There are 2 ways to launch your Ubuntu bash shell at a later time:
- Run
Bash.exe - Pin Ubuntu to the start menu taskbar
Launch WSL with Bash.exe
You can launch your Ubuntu bash shell by running Windows’ Bash.exe. You can launch Bash.exe by typing bash into the search bar in the start menu and pressing enter:

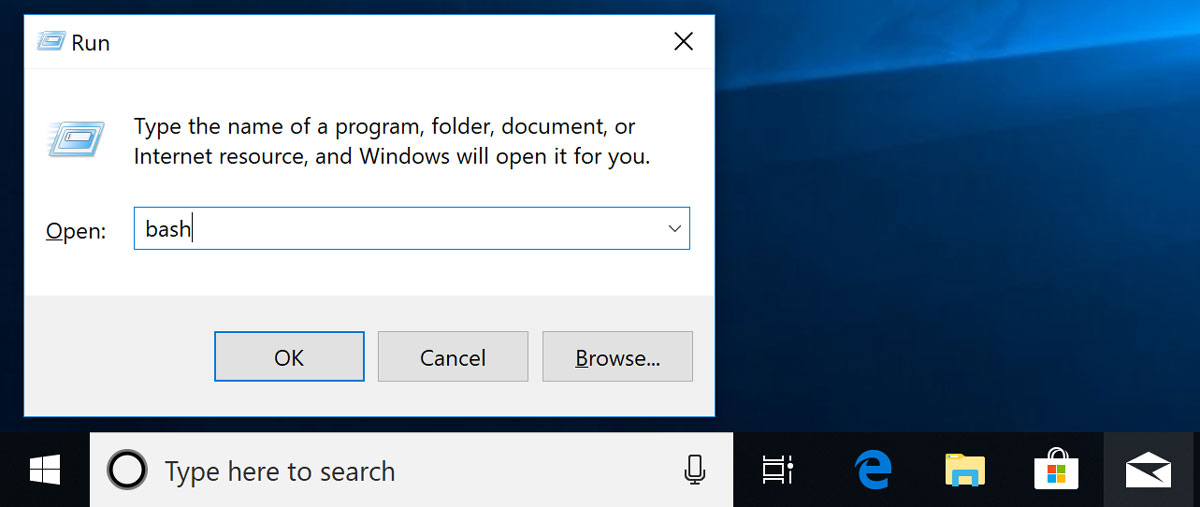
Or by running bash in the run dialogue, which you can open by pressing Windows + R:
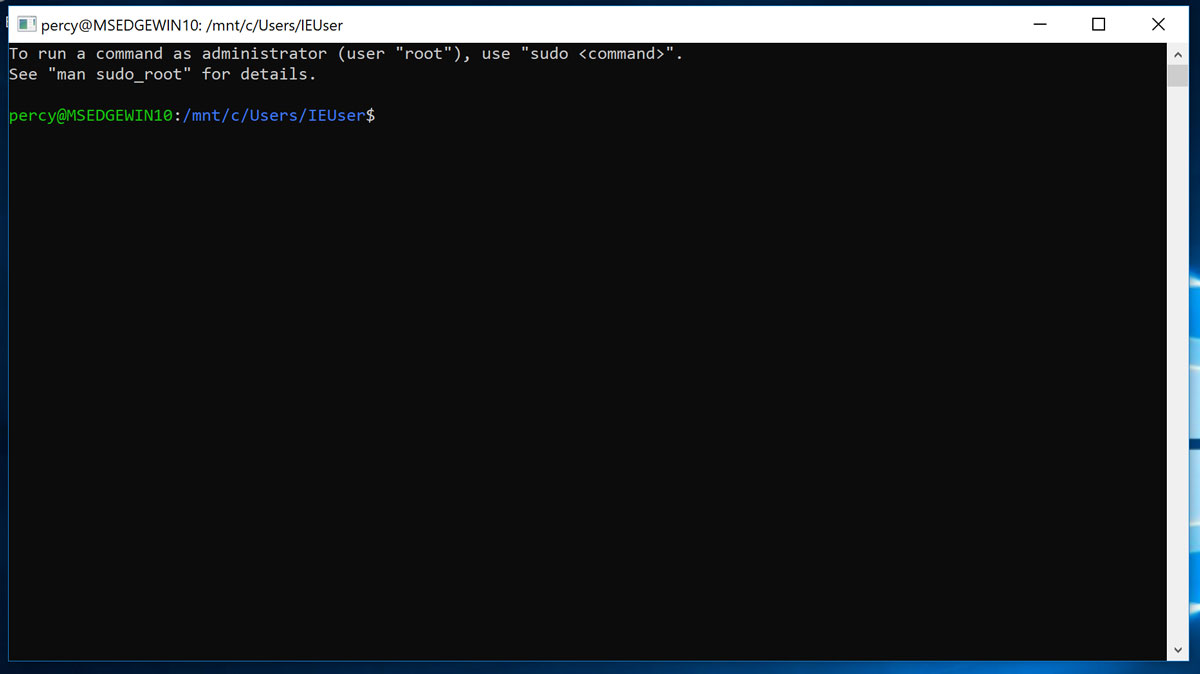
Both methods will launch a new window with your Ubuntu bash shell:
Bash.exe is located at C:\Windows\System32\Bash.exe.
Pin Ubuntu to the start menu taskbar
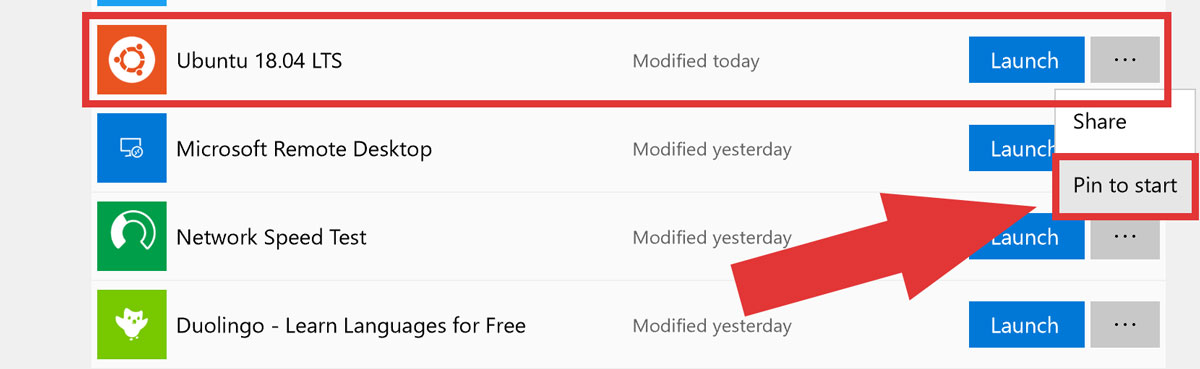
Another convenient way to access your Ubuntu shell is to pin it to the taskbar. To do this, first open Microsoft Store and go to My Library:
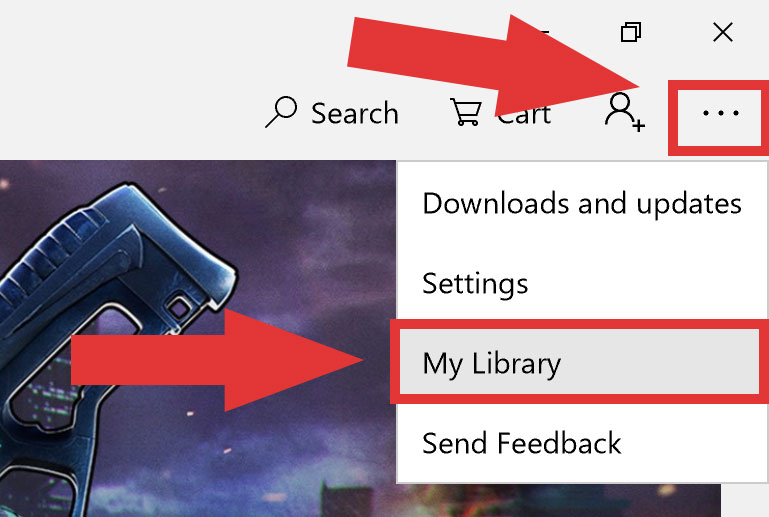
Next, click ... to the right of the Ubuntu item in your library and click Pin to start:
A shortcut icon to Ubuntu will be added to your task bar:

Clicking the icon will launch your Ubuntu bash shell in a new window: